Learn how to cut and peel butternut squash safely with this step-by-step guide. Includes tips for peeling, cubing, storage, and easy hacks to make prep simple.
Fall and winter are right around the corner, and that means it’s squash season! I love how versatile butternut squash is, but because of the shape, they can be intimidating to cook. Whether you need to cube, slice, or dice your squash, I’ve got an easy step-by-step tutorial to walk you through preparing your winter squash for any recipe! Learn How to Cut and Peel Butternut Squash in under 10 minutes.
How to Cut and Peel Butternut Squash
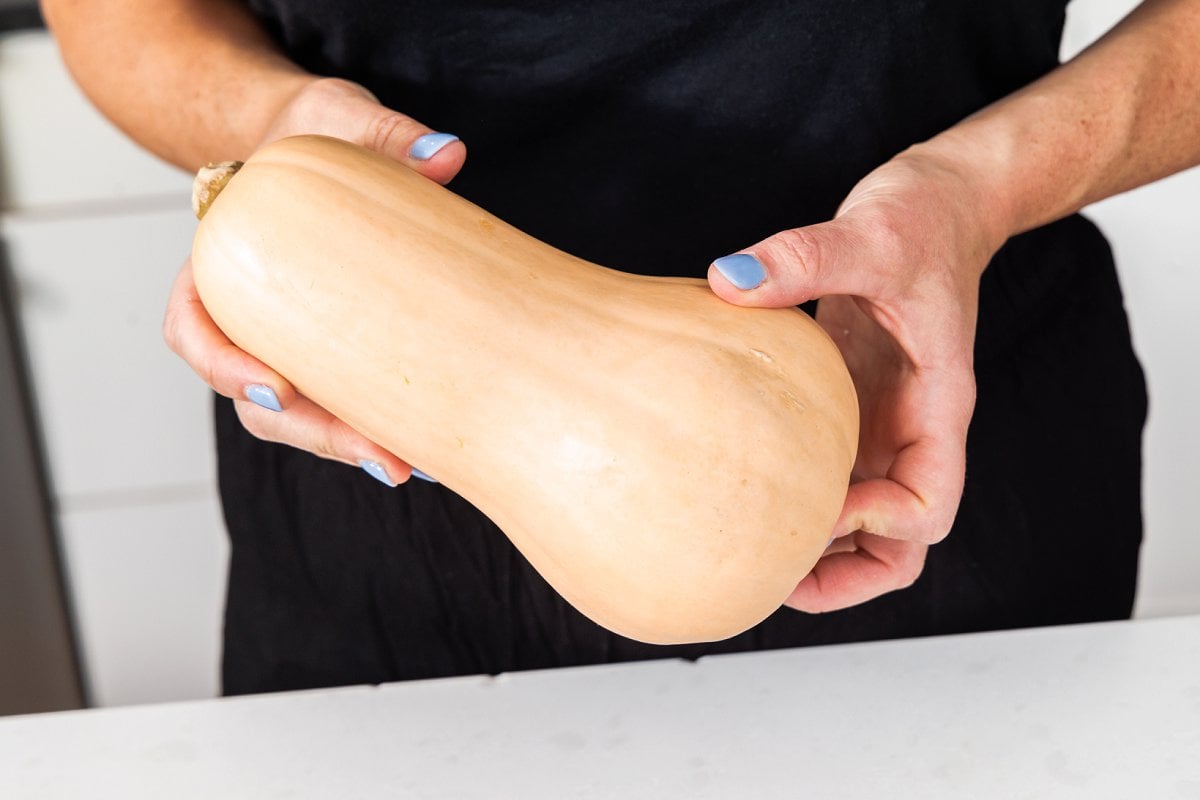
Step 1. Take your butternut squash and place it on it’s side on a large cuttingboard.

Step 2. Using a wide vegetable peeler, peel skin off the squash, moving in a circle until all removed.
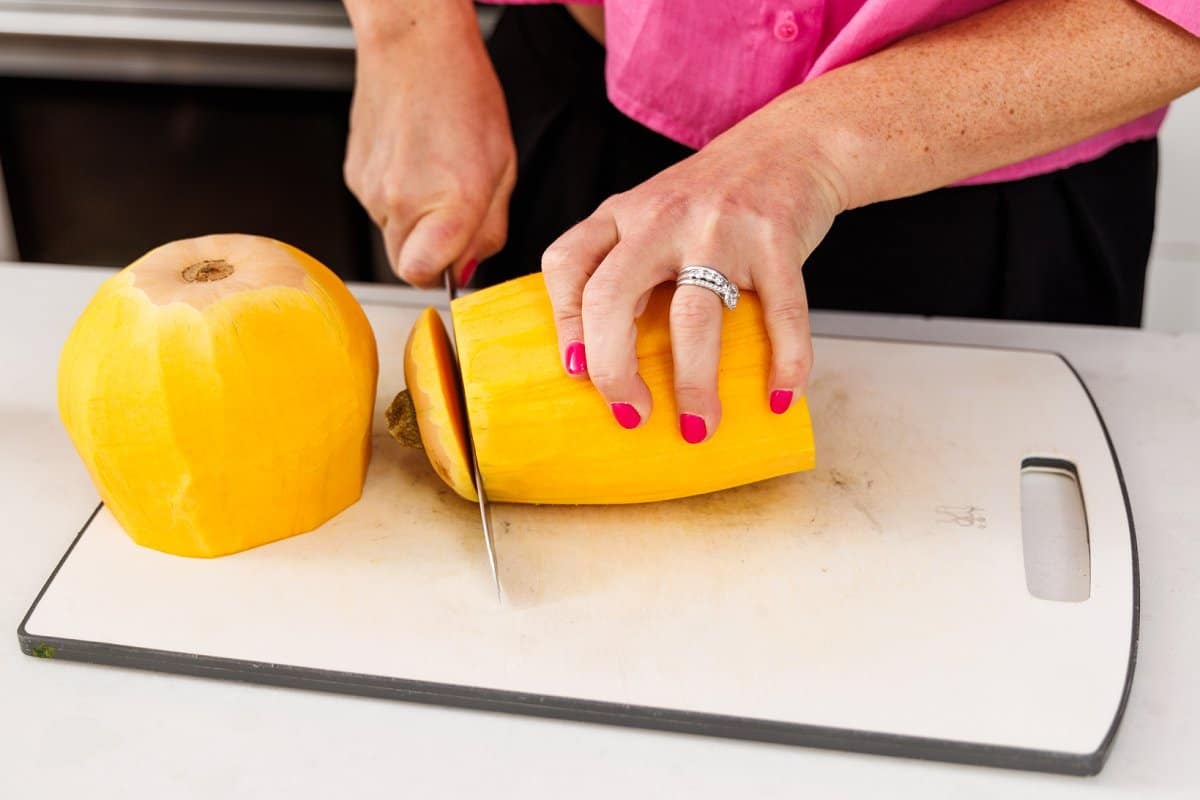
Step 3. Using a sharp knife, cut the butternut squash in half, and trim off the top and bottom to remove the stems.
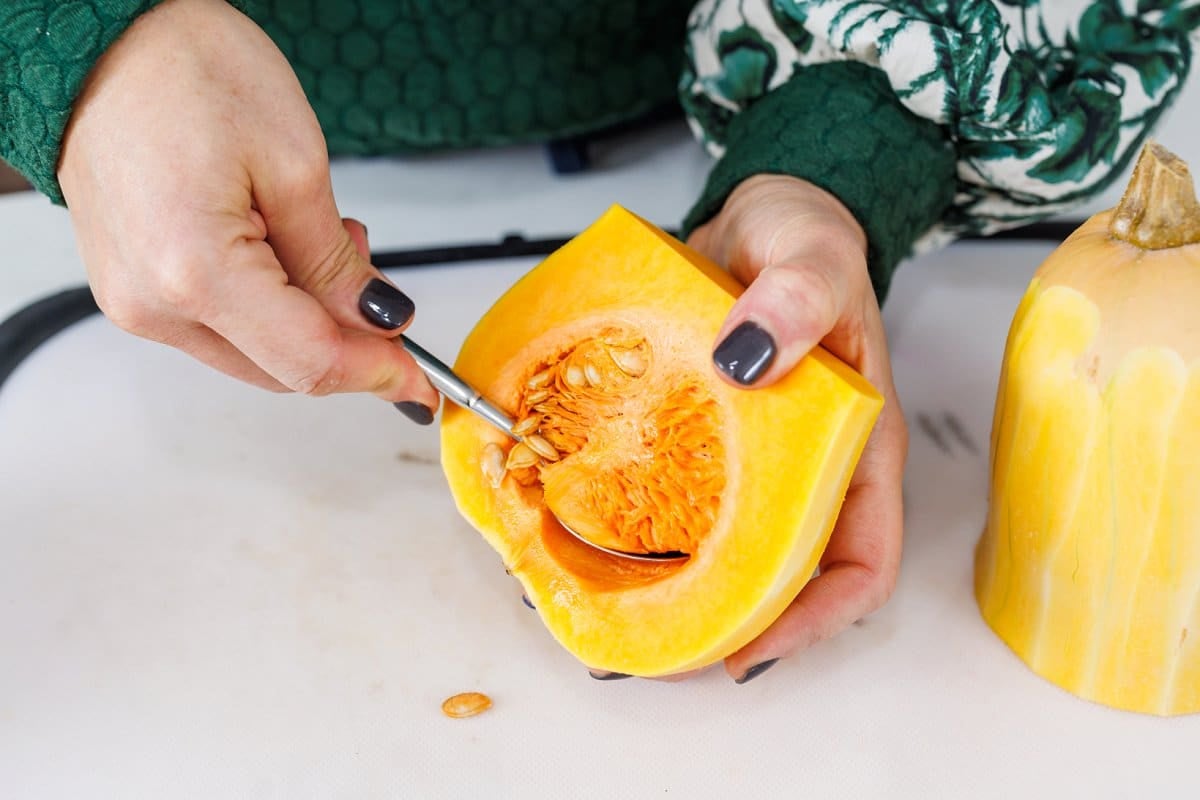
Step 4. Slice the squash in half vertically, and use a large spoon or spatula to scoop out the seeds. You can discard, or roast them like pumpkin seeds!
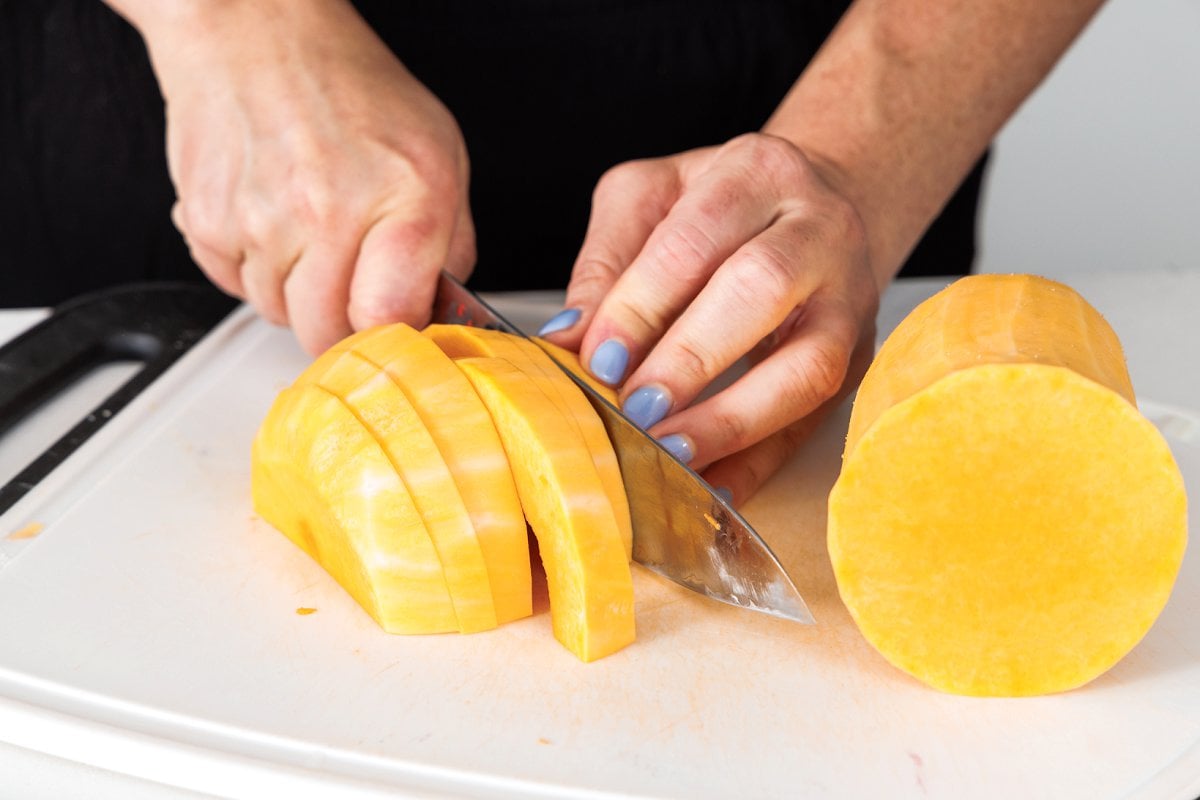
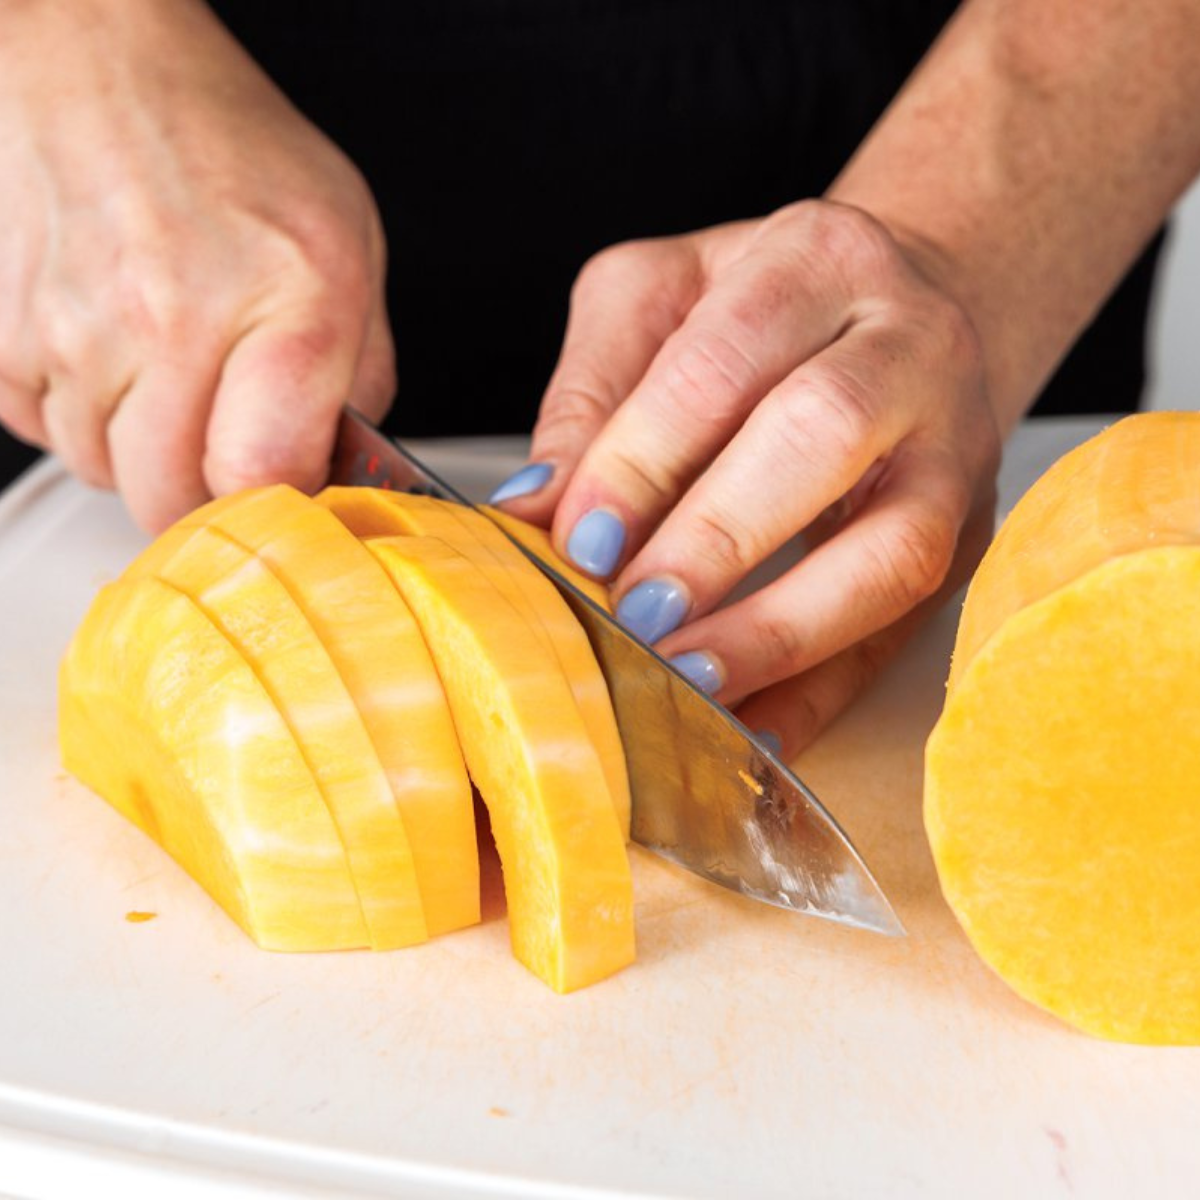
Step 5. With the peeled and cleaned halves, you can now cut into slices or cubes.
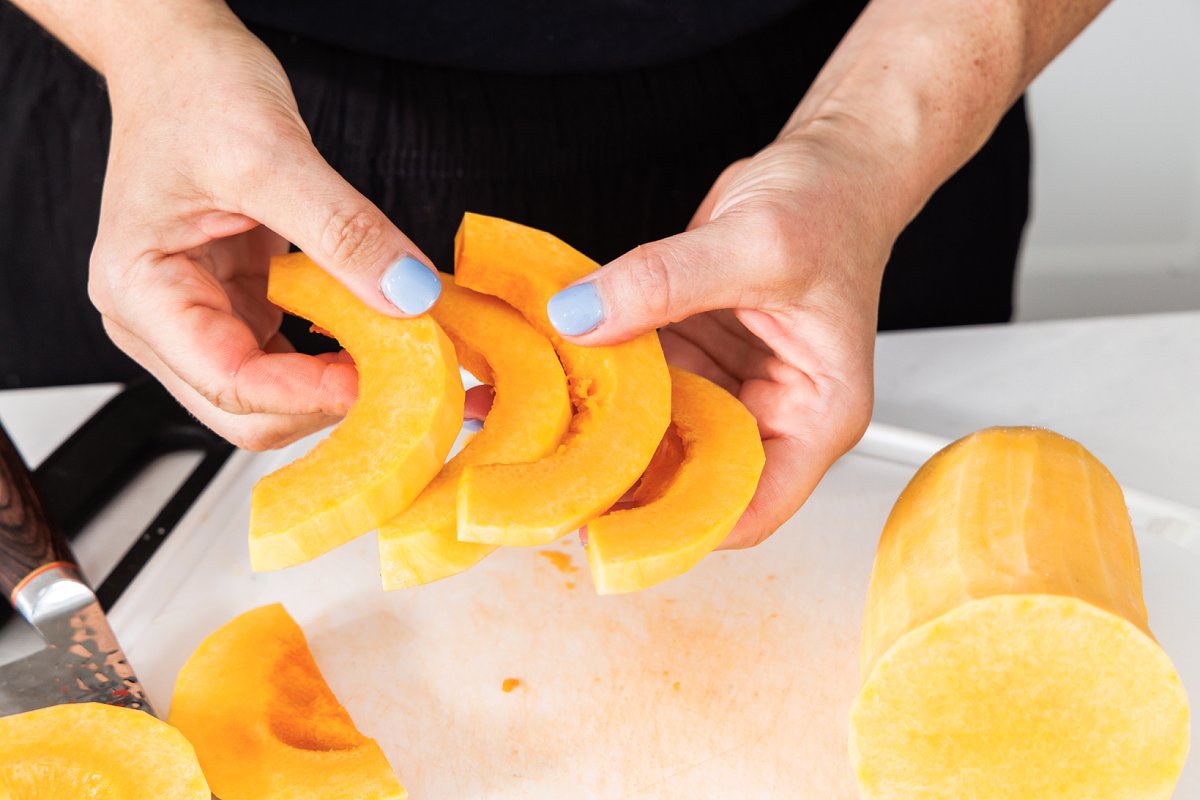
Step 6. Continue slicing until all of the squash is cut.

You’re now ready to turn your squash into soups or roasts. Now you know how to cut and peel butternut squash!
Storage and Freezing Tips
One of the best things about butternut squash is how well it keeps, both in the fridge and the freezer!
- Whole squash: Store in a cool, dark pantry (not the fridge) for up to 2–3 months. Make sure it’s uncut and free of blemishes for the longest shelf life.
- Cut squash: Once peeled and cubed or sliced, transfer to an airtight container or resealable bag. It will stay fresh in the refrigerator for about 5–7 days.
- Cooked squash: Roasted, steamed, or pureed squash keeps well in the fridge for up to 4 days in an airtight container.
- Freezing: To freeze, spread on a parchment-lined baking sheet and freeze until solid before transferring to a freezer bag. This prevents clumping and keeps them good for up to 3 months. You can also freeze cooked squash or puree in portion-sized containers for quick weeknight meals.
Recipes to Make with Butternut Squash
- Roasted Butternut Squash Soup
- Butternut Squash and Sausage Pasta
- Mashed Butternut Squash and Sweet Potato
- Sausage, Kale, and Butternut Squash Soup
- Honey Chipotle Glazed Butternut Squash
Eat It, Like It, Share It!
Did you try this method and love it? The next time you try it, snap a picture and share it to your socials! Tag @thelemonbowl and #thelemonbowl so we can admire and share your dish.
Have you tried my
How to Cut and Peel Butternut Squash (Step-by-Step Guide)?
Leave a 🌟 star rating and let us know how you liked it in the 📝 comments and share it on Instagram, Facebook & Pinterest.
We love hearing from you! This helps us continue to provide free, high-quality recipes.
Ingredients
Video
Equipment
Instructions
- Place the butternut squash on its side on a large cutting board. Using a sharp chef's knife, slice off the top of the squash, about .5 of an inch from the stem. Repeat on the bottom removing the lower .5 inch of the squash.
- Using a wide vegetable peeler, begin peeling off the skin of the squash. Continue until you've removed all of the skin from the squash. Discard before moving to next step.
- Cut the squash in half vertically, removing the bottom curvy side from the thinner top half. Next, slice the bottom curvy portion in half and carefully use a spoon to remove seeds. You can discard or roast similar to how you'd roast pumpkin seeds.
- I like to slice the bottom curvy side into thick slices for roasting which is great for soups or a quick side dish. For the top, I like to cut in large slices then go back and cut into cubes for roasting, stewing, air frying and more.
- Enjoy squash immediately or refrigerate in an air-tight container for up to 4-5 days. Alternatively, you can freeze it in a sealed container for up to 3 months.
Liz’s Notes
Frequently Asked Questions
You can microwave, steam, or throw in the oven a whole butternut squash to try softening it before cutting. 3-5 minutes in the microwave will usually do the trick!
Technically every part of a butternut squash is edible, but I always peel mine, and I’ll only eat the seeds if I’ve cleaned and roasted them.
You definitely can! But many don’t find the texture pleasant, and it can be bitter compared to the flesh of the squash.


Leave a Reply